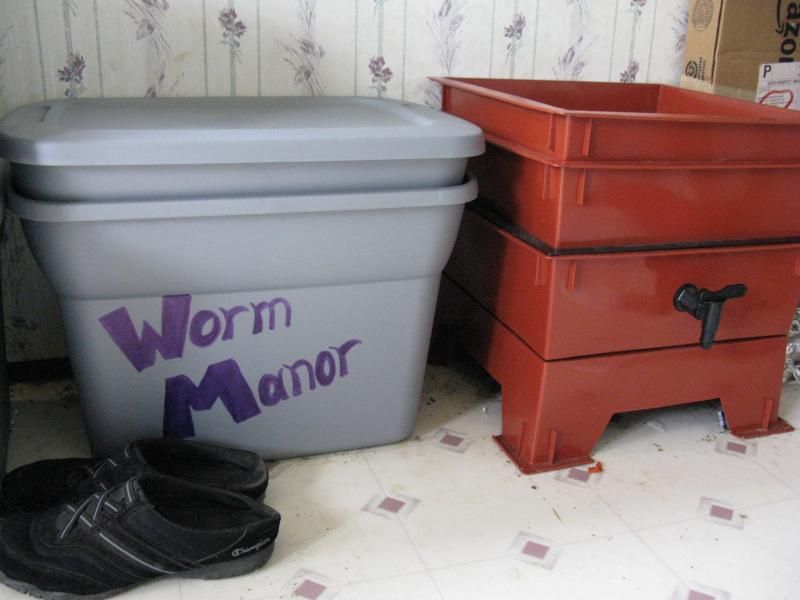
Using the VermicomposterUsing the Stacking SystemThe
basic idea is to fill the bottom tray, then add a tray. If you are
using shallow trays like on most commercial vermicomposters, fill it to
about 1” below the top before adding another tray. If you are using
large bins in a homemade vermicomposter, fill them a little over halfway
before adding a new bin.
Here is how the system works with four worm trays/bins:
Step 1: Starting outTray
1 – Place a layer of damp newspaper on the bottom of the tray/bin. Add
moist bedding, some garden soil (if possible), worms, and food. Keep
covered with a light over the bin for two days. On the third day, check
the worms. If they are moving about the food you put in the bin, you
can now add food and bedding until full. Keep covered. You no longer
need the light shining on the bin. If the worms are not moving about in
the food, give them another two days and check them again.
Step 2: ProcessingRemove
cover and add Tray 2 on top of Tray 1. Tray 1 is now a processing
tray. DO NOT add food to Tray 1 anymore. Tray 2 is now the feed tray.
Add bedding and food (about equal amounts of both) along with a bit of
garden soil to Tray 2 until filled, keeping it covered.
Step 3: ProcessingRemove
cover and add Tray 3 on top of Tray 2. Tray 1 and Tray 2 are now a
processing trays. DO NOT add food to Tray 1 or Tray 2 anymore. Tray 3
is now the feed tray. Add bedding and food (about equal amounts of
both) along with a bit of garden soil to Tray 3 until filled, keeping it
covered.
Step 4: ProcessingRemove
cover and add Tray 4 on top of Tray 3. Tray 1, Tray 2, and Tray 3 are
now a processing trays. DO NOT add food to Tray 1, Tray 2, or Tray 3
anymore. Tray 4 is now the feed tray. Add bedding and food (about
equal amounts of both) along with a bit of garden soil to Tray 4 until
filled, keeping it covered.
At this point, you have a stack of
trays that are in process and worms will be moving about through all of
the trays, though the bulk of the population will be moving upwards.
Step 5: HarvestingRemove
cover. Move Tray 1 to the top of the stack. Tray 2 will now be the
bottom of the stack of trays. Use your garden cultivator and/or scraper
to gently loosen the material in Tray 1 and remove it from the sides
towards the center in a mound. Leave the cover off in a well-lit area
or shine a lot on the top of Tray 1. This will encourage any worms that
are in the tray to move down into the feed tray. In about 30 minutes,
begin removing the compost from Tray 1 until you encounter worms.
Repeat loosening material and waiting with light on the tray until the
worms have all moved out of the tray and you have harvested all of the
compost from the tray. The tray is now available to be added as the
next feeding tray once Tray 4 is full.
Keep the trays rotating so
that the top one is the only one you add food to and the bottom one is
the one you harvest from. Harvest from the bottom one as the top one is
filling up so that you will have another tray to add when the top one
gets full.
If you are using a large homemade bin system, I
would recommend using no more than four bins or the stack could become
unwieldy. The smaller commercial systems are designed to be able to
stack many trays high.
TroubleshootingFinding other critters in your bins – Other critters are not uncommon in the worm bin.
Here is a guide to what you are likely to find and what, if anything, you should do about it.
Worms are forming a ball
– Worms ball up when they are stressed. Some things that cause stress
include temperature extremes (too hot or too cold), the environment is
too wet or too dry, or food they find icky. The bedding should feel
about like a wrung sponge; it should not be drippy wet, but should feel
damp. As for food, worms do not like meat or dairy and they are not
fond of spicy or salty foods in general. Also, feeding them garden or
farm materials that have been chemically treated may upset them.
Worms are escaping!
– Stress can cause worms to escape their bin. Check “worms are forming
a ball” above to identify what may be the cause of their stress. To
keep them in the bin, you can take the lid off and shine a light on the
bin. They don’t like light and will burrow down to get away from it,
keeping them in the bin. Make sure the bedding doesn’t dry out too much
with the lid off and try to identify what it is that is upsetting the
worms to fix the issue.
ANTS!
– Unless you already have an ant problem, your bin should not attract
ants. However, if you have an ant problem (like we do) you can put a
tray under your bin or a dish under each leg. You can try putting water
in the tray or dishes, but some ants can traverse water. If yours can,
use a bit of oil instead. We use peanut oil because it comes in huge
jugs for frying and we use a lot of it in our honey processing shed to
keep ants out of the various honey processing areas. You can use olive
oil, vegetable oil, etc.
Using/Storing Your Compost and LeachateCompostYou
can put your fresh compost directly into your garden or plant pots. If
you have no garden or potted plants (you probably do if you are on ZS),
give it to your friends and neighbors or maybe sell it at a farmer's
market (check your local regulations). I typically find this stuff
going for about $1.75/lb as I write this.
To store it, do not
put it in an airtight container. According to Nature's Footprint (the
maker of the Worm Factory), "placing actively decomposing organic
materials in an airtight container encourages anaerobic organisms to
take over, and form plant toxic by-products which can cause a foul
smell". Let the material dry a little so that it is damp but not wet.
Store in a container that is not airtight and cover with a moist layer
of newspaper. This allows the organic material to stabilize in an
aerobic environment and gives it a shelf-life of about three years.
LeachateLeachate
is basically waste produced by the system. Since a system contains
both "good" and "bad" bacteria, you should not use Leachate on edible
plants. You can use it on flowers, but you should dilute it ten parts
water to one part leachate and aerate (with a pump, by stirring
vigorously, or by pouring repeatedly from one container to another). If
it smells, discard it where it will not harm plants.
Worm TeaLeachate
is sometimes confused with "worm tea" which is beneficial to plants.
Worm tea is formed by brewing vermicompost in clean, chemical free
aerated water to encourage the growth of beneficial microbes that are
great for gardens, including edible ones. Adding molasses to the water
stimulates "good" microbial growth. This worm tea can be used like a
medicine sprayed on sick plants, overwhelming the "bad" microbes with
"good" ones to help the plant get better. It boosts the plant's immune
system to help it resist parasites like aphids and nematodes. While
vermicompost is great for growth, it is best for food at the roots as it
breaks down over time while the worm tea is great for spraying on
plants to give them a boost with good microbes.
Check the Vermiculture or Worms links to the right under "Posts by Topic" to learn more about vermicomposting including how to build your own inexpensive vermicomposter.