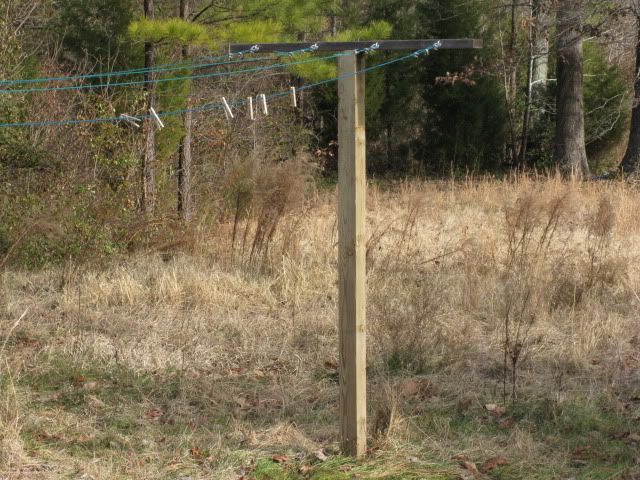
I built this clothesline March 2010. Children have used it as a jungle gym when they thought I wasn't looking and I have used it extensively throughout every year since it went up. There are several loads of towels hanging on my clothesline as I write this.
Posts
For each post, I used:
1 treated 4x4x8
1 treated 2x4 cut to a length of 4'
4 eye bolts
Nails
Quikrete
I used a screw and several nails to attach the 2x4 T to the top of the 4x4 post, but I'm afraid I can't tell you what nails and screws they were as I found them in a bucket in the barn when we moved in. They appear to be galvanized nails, but I don't know what size they are. You shouldn't have any problem finding something sufficient at your local home improvement store.
 The eye bolts are attached to the narrow face of the 2x4 T. I placed the first eye bolt in six inches from the end and added three
more, each 1ft apart. This allows for good air flow between rows of
clothes and accounts for the wind blowing things around. Put your eye bolts in before you put your post up.
 Consider how far apart you want your posts. The line I recommend below usually comes in 20 ft or 100 ft lengths. Check below to see how to install the line before deciding, because you have to include the tail of the line in your measurements. You can center your holes 20' - 22' apart and have plenty for all four strands from a 100' roll of line.
Use a post hole digger to make a hole for each post 1.5' - 2' deep. I bought this hand auger for putting up my line and have used it extensively since. I find it a lot easier to use than a clam-shell digger and even my kids can dig perfect holes with it.
Slide the post into the hole and fill the hole about half full with Quikrete. Wet the Quikrete and let it set overnight (Quikrete does not require mixing like other concrete mixes and is great for posts). The next day, backfill the rest of the hole and string your line (more on stringing the line below).
Wire Clothesline
My first line was polyester line that claimed it wouldn't sag, but it sagged big time. After some research on the various types of line available, I chose coated wire. Rope lines sag over time if not right from the start. Depending on the material, they can harbor mold and mildew, as well. Coated wire is easy to clean and does not sag as much.
This year, my line seemed to be sagging. I thought this odd since I hadn't experienced significant sag in the line previously, but I thought perhaps the green plastic coated wire had finally reached the extent of its life. It turns out, however, that my husband hit one of the posts with his tractor and didn't tell me about it. The post snapped under ground level and took a while to shift in the dirt, so it was not immediately obvious and I purchased the new wire before I discovered the real problem.
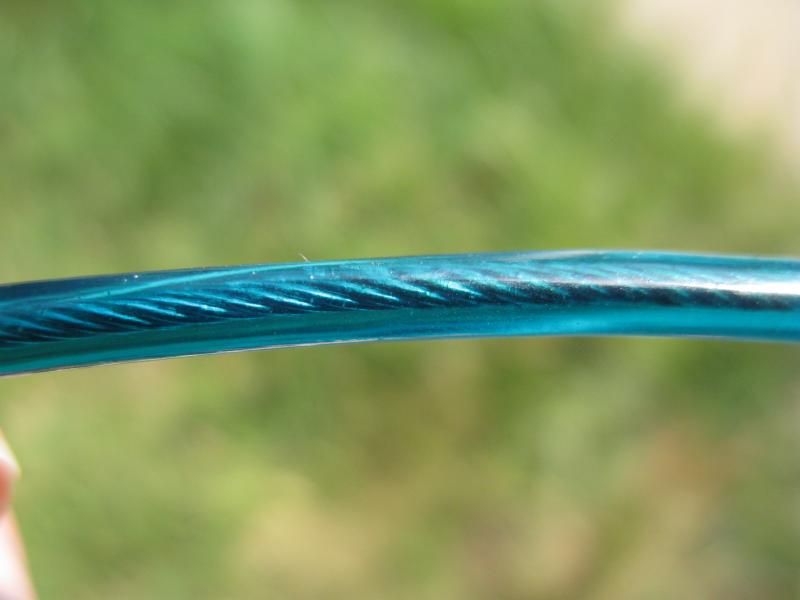
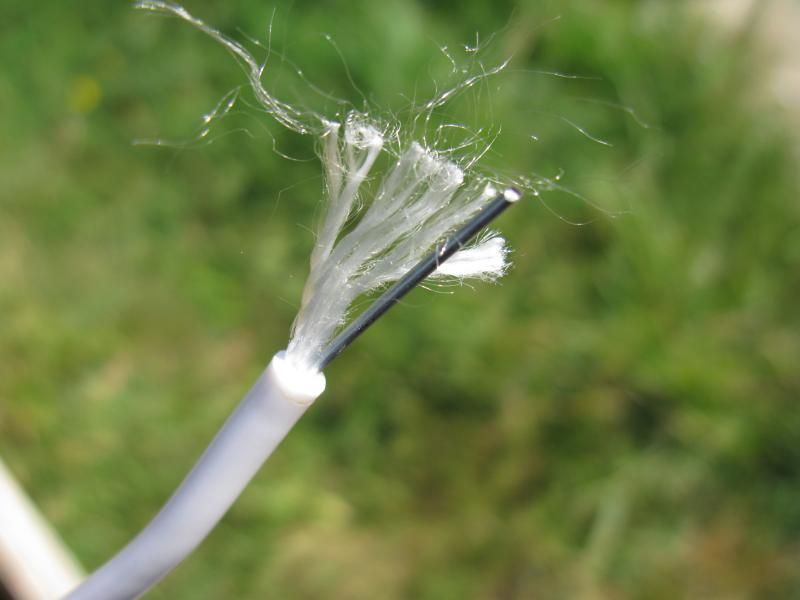
I saw white plastic coated wire on Amazon and thought maybe it was the same thing as the green coated wire I was already using, just a different color. I figured I would give it a shot, but I learned that it is not the same thing:

The white line is a single wire and thin rope inside while the green line is twisted wires inside. The white line had a tendency to kink and was difficult to work with. It was hard to get it taut.
I recommend skipping the white coated wire line and going with the green coated wire line.
I have learned that a lot of people try to knot these wires rather than use hardware to properly assemble the line. The white wire would be nearly impossible to knot and it just seems silly with any wire product. You really want to use wire clips and thimbles. That link is to one on Amazon, but I believe the ones I bought were cheaper at WalMart. You can usually find them at places like Lowes and HomeDepot, too. You can find them where you would fine clothesline.
Each clip consists of a U bolt, saddle, and a pair of nuts. A pack for a wire clothesline consists of a thimble that slides onto an eye bolt on your post and two or three clips. The standard is typically three, but two may be sufficient. You can generally find instructions for using these on the package, but let me give you a brief rundown.
 One major thing to remember when using these clips is "never saddle a dead horse". That may seem a bit macabre, but it's easy to remember. The U bolt goes on the tail (or dead) end of the wire while the saddle goes on the line itself.
As shown in the illustration, a standard assembly includes three clips: one at the thimble and the other two about two inches apart.
To attach the clip, simply place the U bolt against the tail and slide the saddle over the legs.
Then add the nuts and tighten. You can use a wrench to accomplish this, but I find that it is much easier with a ratchet, especially considering you need three clips for each end of each line (that's 24 clips total for my setup). That's a heck of a lot more work with a wrench.
Here are a couple of pics showing how the line looks assembled with the thimble and clips:
Please don't laugh at my awful nail job.
Ok, you can laugh. It is really awful. I'm better at it now. I used more substantial nails to attach the T to the post. The T rocked in a bit of a pivot and it didn't occur to me at the time to add a nail or two in the top to put an end to that. Instead, I attempted to nail this bit of board to the front of the post with some rather weak little nails I found on our property. They really did not want to go in! Anyway, that bit of wood and mess of nails was part of my learning experience. It did solve the problem, even if it wasn't the best possible solution.
This is a pretty simple project. It is a little labor intensive, but if you do it right the first time, it will last you many, many years (unless somebody comes along with a tractor to break your post!).


No comments:
Post a Comment