Things to Know
- You will get liquid called leachate. Most if not all commercial vermicomposters have a catchment for this, but you will have to account for it if you build your own. If you don’t, you will have soggy, unhappy worms.
- You do not have to stack trays/bins. The stacking method keeps worms moving from old castings to fresh food. This helps to separate them from the castings you want to harvest so you don’t have to spend hours digging your worms out of your harvest by hand.
Single Bin Vermicomposter
This link has some general vermiculture information and some basic information regarding how to build this simple, one bin vermicomposter:

Stacking Vermicompotser
This link has instructions to build this “Cheap and Easy Worm Bin”:

For what I would call a “luxury” vermixomposter, use three or four bins instead of two. Use four cups as a stand just like in the “Cheap and Easy Worm Bin” instructions, but add a spigot to this bottom bin and four more cups inside. This bottom bin acts as a catchment for the liquid (leachate) and the spigot makes it easy to harvest. The other two or three bins are worm trays. The bottom worm tray sits on the cups in the leachate bin.
My Homemade Vermicomposter
Parts:
3 x 8 gallon totes (I used one for a catch tray and two for worm trays - you can add more worm trays but this is a good starting size)
4 x small cups (I used Mainstays food storage cups, which come in a pack of 6)
Tools used:
Drill with 1/4" bit
Leatherman Squirt PS4 multitool (the pliers and file)
Ruler (not really necessary, you can eyeball it - the worms don't really care how perfectly the holes are spaced)
Steps
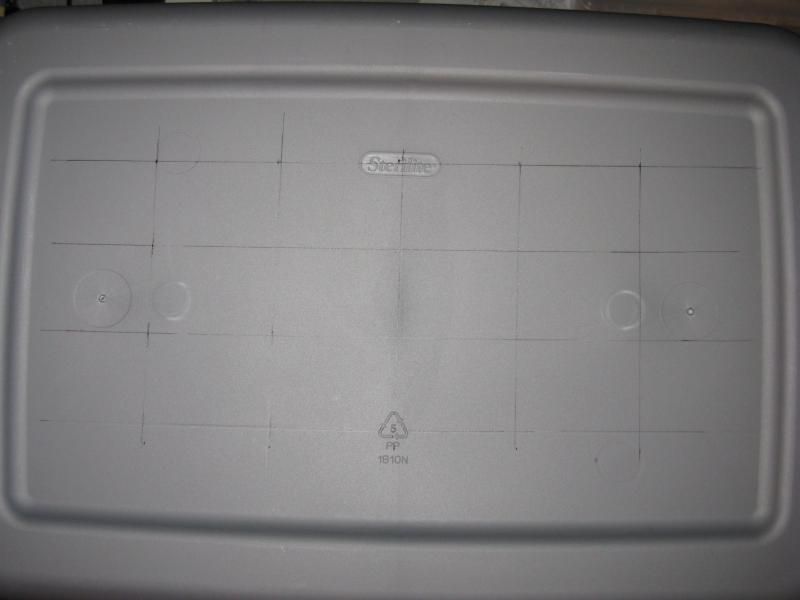
1. I measured and drew a grid that would give me 20 cross points:
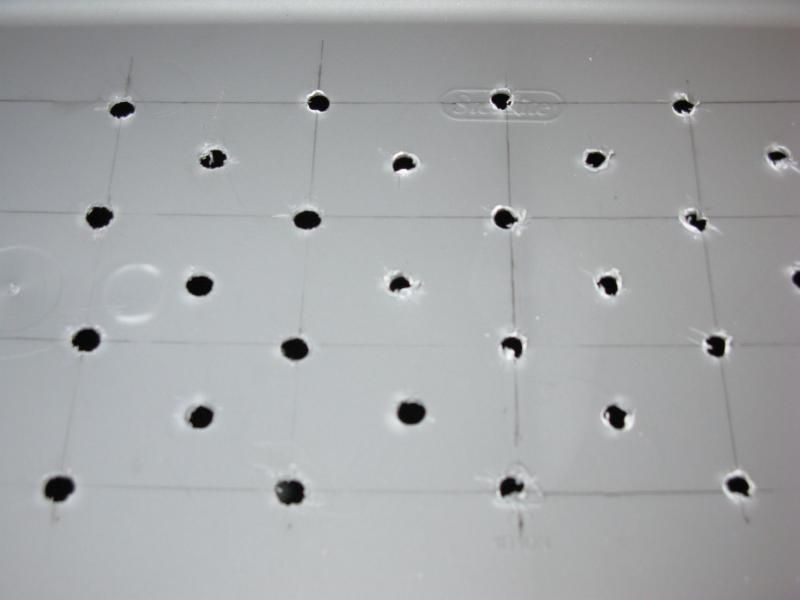
2. Drill holes at the cross points and in the center of each drawn square/rectangle. I stacked two bins together and drilled both at the same time.
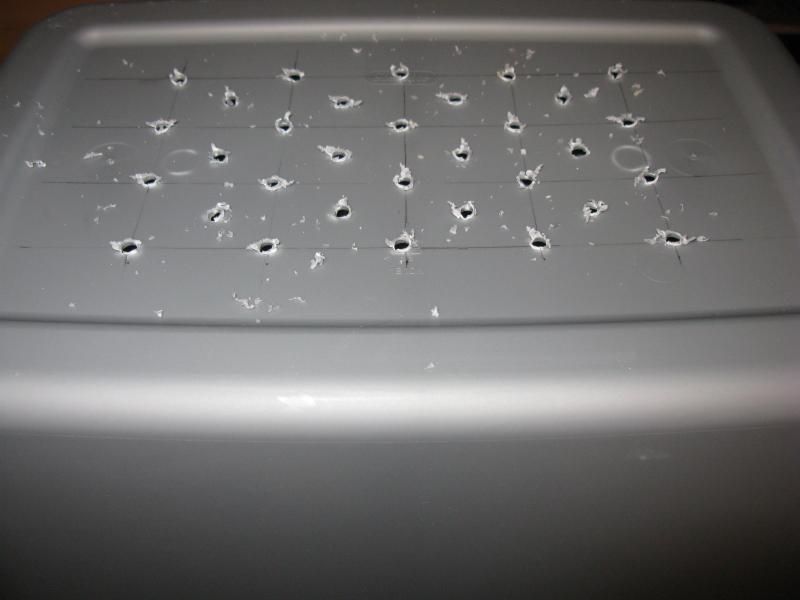
This is the result of drilling in plastic. There's lots of hard little plastic bits that need to be removed.
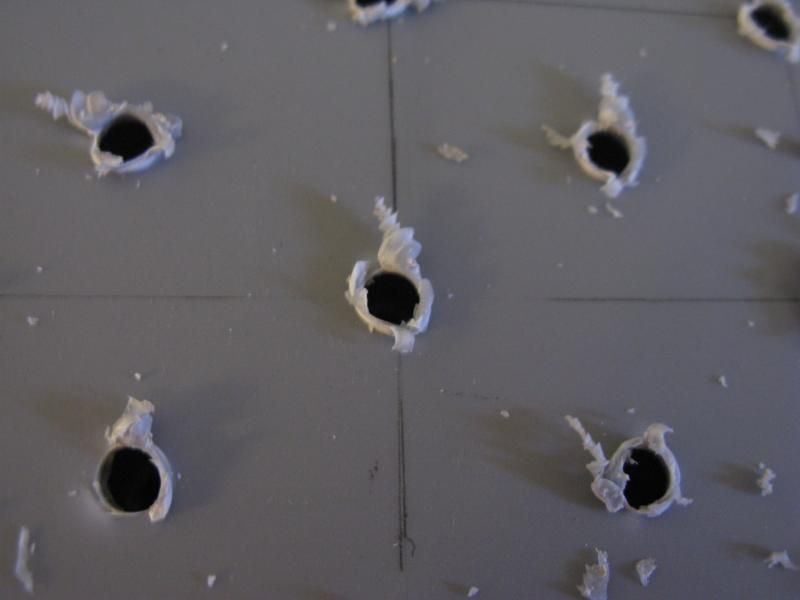
3. Clean up the holes. I used pliers to pull off larger pieces of drilled plastic and a file to clean up the edges of the holes. The file on my Leatherman Squirt is the perfect size for this.

Here is the work in progress (holes on the left have had some work compared to the ones on the right that still need a lot of work):
4. Put the cups in the catch bin and set one of the drilled totes on the cups.

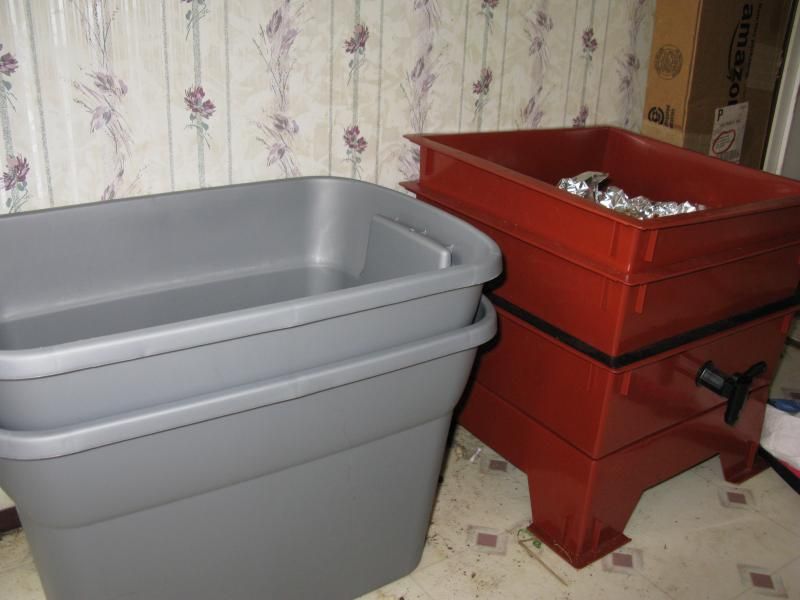
Here you can see the homemade worm condo next to the commercial Worm Factory. They are very similar.
Cost comparison:
1 pack of cups x $1.84 = $1.84
3 totes x $4.97 = $14.91
Homemade vermicomposter cost = $16.75
The five-tray Worm Factory my son bought = $99.95
The standard 3-tray Worm Factory = $79.95
You could make this homemade vermicomposter and buy yourself a Leatherman Squirt PS4 for $29.05 and still save money over buying the commercial model.
Notes:
The instructions for the “Cheap and Easy Worm Bin” directed you to drill ventilation holes in the upper portion of the bins. I did not because while air flow is important, the worms don't like light. Having holes in the upper portion of the totes could alter the worms' behavior and leave unprocessed stuff in your bins. I think those upper ventilation holes are a waste of energy. We shall see how well this functions without them.
I didn't have the lid on the homemade model when I took the picture. The Worm Factory has a lid that fits inside the tray. You simply lay it on top of the bedding (ours has some tinfoil on top of the lid to keep the cat out of it). The newer Worm Factory 360 model has an actual lid. Once worms are in, I will lay the lid on top of the homemade vermicomposter to keep the worms happily in the dark and keep their environment moist.

No comments:
Post a Comment